Advantages and Disadvantages
This is an alternative to the Ultra Strat™ Mod and its biggest advantage over the Ultra Strat™ Mod is that
• there are no dead spots for any of the possible switching positions. (Okay, technically, the Super Strat™ Switching does have one "dead spot" - turning all 3 pickup switches off but the Ultra Strat™ mod does this too).
Another advantage of this circuit is that you'll get 2 new sounds -
• neck and bridge in parallel
• neck, middle and bridge in parallel.
As for the disadvantages, the one we always mention is that
• doing any unauthorized work will void the guitar warranty.
• It will definitely change the appearance of your guitar. In fact, this takes up more space than the Ultra Strat™ Mod because there is now a 4PDT switch in place of the DPDT switch and each SPST switch is being replaced by a DPDT switch.
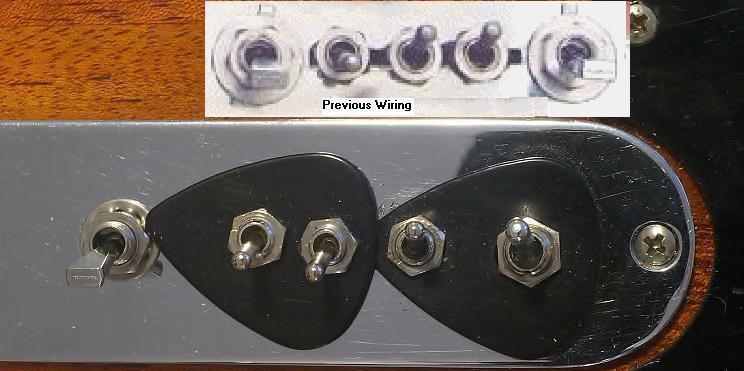 Looking at the above photo, the section labeled "Previous Wiring" shows the switches when I wired the Ultra Strat™ Mod into a 3 pickup Telecaster™ type guitar. The lower section shows the same guitar with the Super Strat™ Mod and its larger switches taking up more room. Basically, the 4 new switches take up about the same space as the 5 switches in the previous wiring and so the 5 switches can no longer be squeezed into the same space as the 5 way lever switch it replaced. (Something else to think about).
• The biggest disadvantage of this circuit is its complexity. This mod requires four DPDT switches and one not-so-easy-to-find 4PDT toggle switch which you'll probably have to order online. (compare this to the Ultra Strat™ Mod which uses 2 DPDT and 3 SPST switches.)
This means that the Super Strat™ Switching will be somewhat more expensive, require much more wiring and take up a lot more space.
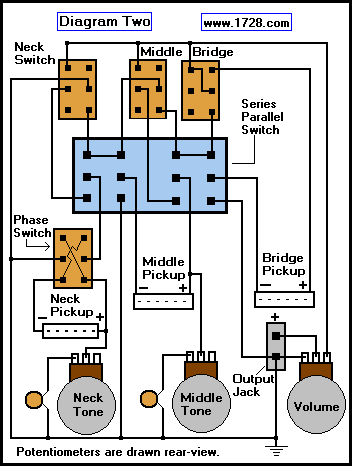
Wiring the Circuit
There are two diagrams for this wiring. The first one shows the specific wiring and soldering points to be done. If the procedure at the bottom of Diagram 1 is followed it should lead to a correctly rewired guitar. (It worked for me because I followed those steps and Diagram One exactly when I did this wiring.)
Of course this is just a suggestion for how you should proceed and by all means come up with your own instructions if you want to.
After following Diagram One, it would be a good idea to get a test meter, set it for resistance and test all possible switching arrangements (series and parallel) to see if you have done the wiring correctly. Series resistance is easy to calculate (just simple addition) but parallel resistance is tougher and here's a calculator to help you.
If you follow Diagram One precisely, when you proceed to Diagram 2, you'll notice that you'll have to disconnect or even cut some wires that have already been soldered. (For example, adding a neck phase switch). Still I think it is a good idea to have everything soldered at this point so that the circuit can be tested.
The second diagram mainly focuses on the rewiring after you've done the pickup wiring.
The Finished Product
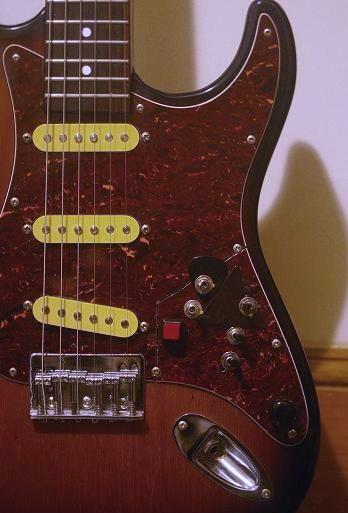
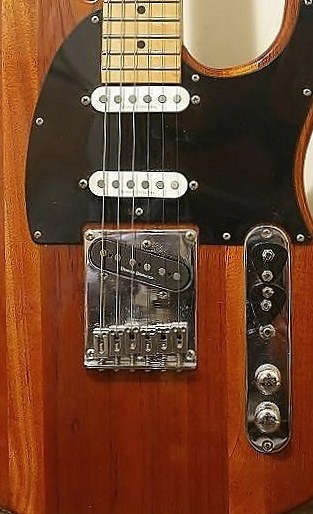 The two guitars shown above were both manufactured by Route 101 Guitars (no longer in business).
Both guitars were recently rewired with the "Super Strat™ Mod". The switching for the guitar on the right can be seen in much greater detail in the close-up photo towards the top of this page.
The guitar on the left had been previously modified many times and I'm surprised that it took only two picks to cover up all that previous work. One thing you might find interesting is that guitar's "pickguard modification".
Why was it done? If you own a guitar that has a pickguard that spans almost the entire guitar body, just getting at the wiring requires removing the strings. Now, with that slot sliced into the pickguard, accessing the wiring only requires the removal of four screws.
How was it done? No, it didn't require a special pickguard cutter and it was cut using only a hacksaw blade. It's easier than using the entire hacksaw and you can do it all by hand - no need for a vise either.
As you can judge from the wiring diagrams, with over two dozen solder connections to make, this is not an easy project to do. However, when you are finished, you will have an extremely versatile and very reliable guitar.
Good luck with the rewiring.
Go To Guitar Wiring Page 3
Return To Home Page
Copyright © 1999 -
1728 Software Systems
|
|